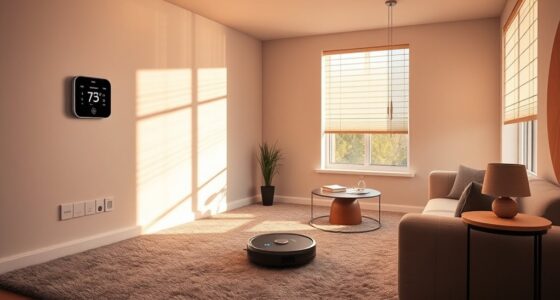

The cheapest way to make your own smart doorbell is by using affordable components like a Raspberry Pi or Arduino, a waterproof camera, and a doorbell button, all installed with simple guides. This DIY approach typically costs under $100, saving you money compared to buying commercial models. Plus, you can customize features and avoid extra installation fees. Keep going to discover step-by-step details to build your budget-friendly, personalized smart doorbell.
Key Takeaways
- Use affordable microcontrollers like Raspberry Pi or Arduino with open-source software for cost-effective setup.
- Select inexpensive waterproof camera modules and basic doorbell buttons to minimize expenses.
- Power the system with batteries or existing wiring to avoid costly professional installation.
- Build the smart doorbell yourself using online tutorials, saving on installation and labor fees.
- Customize features and add functionalities without extra costs, keeping the total under $50 to $100.

Creating a smart doorbell doesn’t have to break the bank. If you’re looking to upgrade your home security without spending a fortune, building your own smart doorbell can be a cost-effective solution. The first step is understanding that DIY installation is straightforward and can save you a significant amount compared to buying a pre-made system. Instead of paying for professional setup, you can follow simple guides and use readily available components to get the job done. This approach not only reduces installation costs but also gives you the satisfaction of customizing your device to suit your needs.
Building a smart doorbell saves money and offers customization.
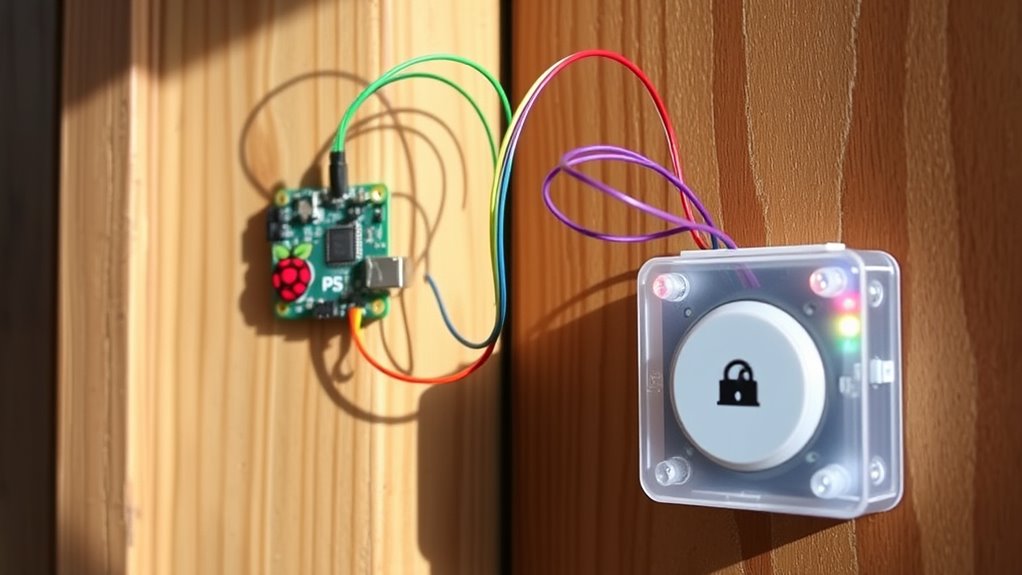
When considering the cost comparison between DIY options and commercial products, you’ll find that the DIY route typically costs a fraction of the price. Off-the-shelf smart doorbells often come with hefty price tags, especially when you factor in installation fees. In contrast, by sourcing affordable parts like a Raspberry Pi or Arduino, a compatible camera, and a basic doorbell button, you can assemble a functional smart doorbell for under $50 to $100. These components are widely available online and often come with detailed tutorials, making the process accessible even if you’re new to electronics.
To start, you’ll need a few core parts: a microcontroller or mini-computer, a waterproof camera module, and a power source. You can use a battery pack or connect it to your existing doorbell wiring if you prefer a wired setup. Setting up the device involves installing open-source software like MotionEye or Home Assistant, which allows you to stream video, receive alerts, and control the system remotely. The process is user-friendly, with plenty of online resources and community forums ready to help troubleshoot any issues. This DIY installation guarantees you’re not paying extra for professional labor and allows you to modify features as you see fit. Additionally, understanding materials and engineering helps ensure your project is durable and reliable over time.
The overall cost comparison clearly shows that building your own smart doorbell is budget-friendly. Commercial smart doorbells, including installation, can run from $150 to $250 or more. In contrast, a DIY version with the same basic features will cost much less, especially when you factor in the lack of installation fees. Plus, you gain the flexibility to add custom functionalities, like integrating it with your existing home automation system or adding a siren, without extra charges. This way, you get a tailored smart doorbell that fits your budget and your home’s needs, all while learning valuable skills along the way.

WiFi Motion Sensor, Smart Motion Detector Kit with Phone App Alerts, Includes Gateway Hub, PIR Motion Sensor, Doorbell Button, Door Sensor, DIY Burglar Alarm for Home Business Apartment (Only 2.4GHz)
Smart WiFi Motion Sensor with Free Instant App Alerts – Build your DIY smart home security system with…
As an affiliate, we earn on qualifying purchases.
As an affiliate, we earn on qualifying purchases.
Frequently Asked Questions
Can I Install a DIY Smart Doorbell Without Electrical Wiring?
Yes, you can install a DIY smart doorbell without electrical wiring by opting for wireless installation. Many models run on batteries or have power alternatives like rechargeable batteries, so you don’t need to connect them to your electrical system. Just make certain the doorbell has good Wi-Fi connectivity, and you’ll be able to set it up easily without wiring. This way, you get a smart doorbell that’s simple to install and portable.
What Compatible Smartphones Can I Use With a Homemade Smart Doorbell?
Smartphones seamlessly sync with your homemade smart doorbell, supporting a wide variety of devices. Compatibility typically includes both Android and iOS systems, ensuring your app integration is smooth and straightforward. You can easily connect your device using popular apps like Ring or custom ones designed for DIY projects. As long as your smartphone supports the necessary app and Bluetooth or Wi-Fi, you’re good to go, making monitoring simply more manageable.
How Long Does a DIY Smart Doorbell Battery Last?
Your DIY smart doorbell’s battery life depends on your power management habits and the type of battery you use. Typically, with efficient power management, you can expect it to last from a week to a few months between charges. To extend battery life, optimize motion detection settings, reduce unnecessary Wi-Fi activity, and choose high-capacity batteries. Regularly monitoring power usage helps guarantee your doorbell stays functional without frequent recharging.
Is It Possible to Add Video Recording Features Cheaply?
Yes, you can add video recording features cheaply to your DIY smart doorbell. Imagine capturing crisp video quality that records directly onto affordable microSD cards or cloud storage with minimal cost. You’ll love how easy it is to access recordings whenever you need them. With the right camera module, you get reliable recording storage and clear footage, all without breaking the bank, transforming your doorbell into a smart surveillance tool.
What Are the Main Safety Concerns When Building Your Own Smart Doorbell?
When building your own smart doorbell, you should prioritize privacy concerns and hacking risks. Make sure to secure your device with strong passwords, enable two-factor authentication, and keep firmware updated. Avoid exposing sensitive data online, and consider encrypting video feeds. Staying vigilant about these safety concerns helps protect your home and personal information from potential breaches or unauthorized access.
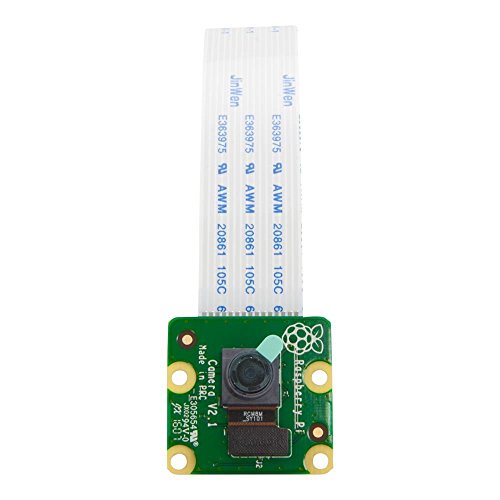
Raspberry Pi Camera Module V2-8 Megapixel,1080p (RPI-CAM-V2)
Second Generation Raspberry Pi Camera Module with Fixed Focus Lens
As an affiliate, we earn on qualifying purchases.
As an affiliate, we earn on qualifying purchases.
Conclusion
Building your own smart doorbell is like planting a seed—it costs little now but grows into a helpful, tech-savvy gardener. When I made mine, I was amazed at how easy and affordable it was, saving me hundreds compared to store-bought options. Just like tending a garden, your DIY project requires a little effort, but the reward is a personalized, budget-friendly upgrade that makes your front door smarter and safer. Give it a try—you’ll be surprised at what you can create!
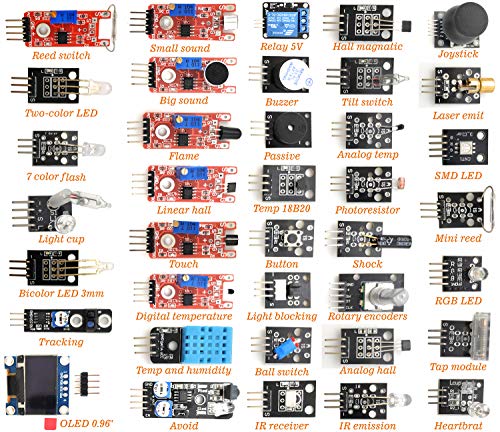
DEYUE 38 in 1 Sensor Module kit for Arduino Rapsberry Pi Project
38 sensor modules and 1 leaflet in a plastic box.
As an affiliate, we earn on qualifying purchases.
As an affiliate, we earn on qualifying purchases.

Ring Spare Parts Kit for Video Doorbell (2nd Generation)
Replace any lost or misplaced parts for your Ring Video Doorbell (2nd Generation).
As an affiliate, we earn on qualifying purchases.
As an affiliate, we earn on qualifying purchases.