
To replace a light switch safely, turn off the circuit breaker controlling the switch and verify the power is off with a voltage tester. Remove the switch cover, unscrew the old switch, and photograph the wiring for reference. Disconnect the wires, ensuring they’re secure, then connect them to the new switch following the manufacturer’s instructions and color coding. Carefully secure everything, turn the power back on, and test the switch. To learn more, continue with these detailed steps.
Key Takeaways
- Turn off the circuit breaker and verify power is off with a voltage tester before starting.
- Remove the switch cover plate and carefully disconnect existing wiring, noting connections with a photo.
- Match wire colors and connections to the new switch’s instructions, ensuring compatibility and proper secure connections.
- Gently fit wires into the electrical box, screw in the new switch, and reattach the cover plate securely.
- Restore power, then test the switch to confirm proper and safe operation.
Replacing a light switch is a straightforward task, but safety should always come first. Before you begin, turn off the circuit breaker controlling the switch to cut power and prevent electrical shock. Confirm that the power is off by flipping the switch and testing the fixture with a voltage tester. This step guarantees you won’t be working with live wires, reducing the risk of injury.
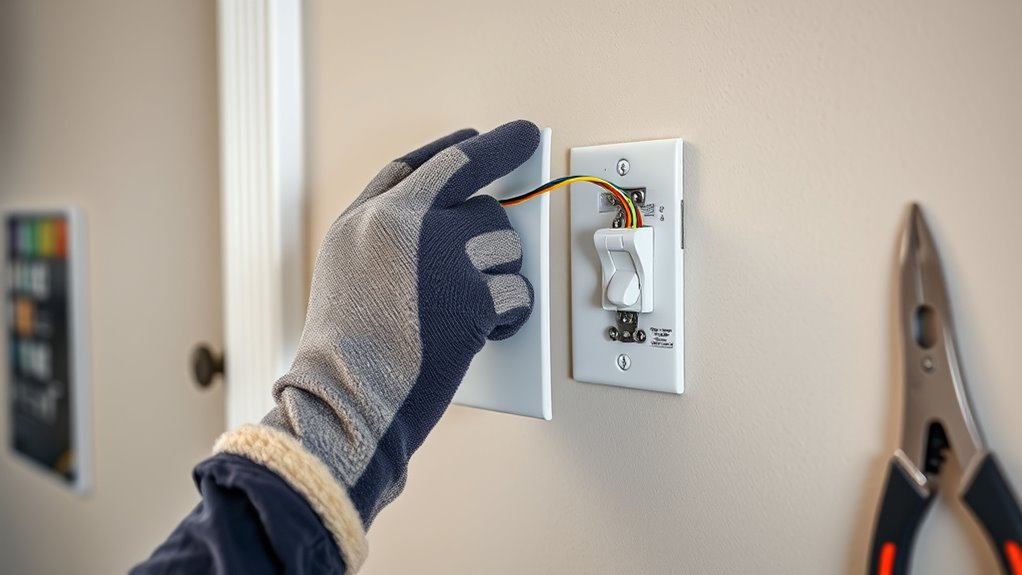
Once you’ve verified the power is off, carefully remove the switch cover plate using a screwdriver. Keep track of the screws and set them aside. Next, unscrew the existing switch from the electrical box, gently pulling it out to expose the wiring. Take note of how the wires are connected, or better yet, take a photo for reference. This will help when connecting the new switch.
Inspect the wires for damage or corrosion. You’ll typically see a black (hot) wire, a white (neutral) wire, and possibly a ground wire. The wire gauge, usually 14 or 12 gauge, indicates the thickness of the wire and the capacity it can handle. Confirm that the wires are compatible with your new switch. If you’re replacing a standard switch with a dimmer or a specialized switch, check the manufacturer’s instructions to ensure proper wiring and wire gauge compatibility. Additionally, understanding the importance of color coding can help prevent wiring errors.
Disconnect the wires from the old switch by loosening the terminal screws or unscrewing the clamps. Carefully untwist any wire nuts if present, and prepare the wires for the new switch. When installing the new switch, connect the wires as per the manufacturer’s instructions, matching the color-coded wires or terminal markings. Make sure the connections are tight and secure to prevent loose wiring, which can cause electrical faults.
Before pushing the switch back into the box, double-check all connections and ensure there are no stray wires or loose strands. Gently tuck the wires into the electrical box, then screw the new switch into place. Reattach the cover plate, tighten the screws, and restore power by turning the circuit breaker back on. Test your new switch to confirm it’s functioning correctly.
Throughout this process, always adhere to safety standards and local electrical codes. If you’re unsure about wire gauge requirements or how to handle certain wiring configurations, don’t hesitate to contact a licensed electrician. Taking these precautions guarantees your switch replacement is not only successful but also safe, avoiding potential electrical hazards.

NSi Industries TES-111 Twin Probe Voltage Tester, 80-250 VAC,Neon
Neon Light Indicates Presence Of Ac Voltage From 80-250 Vic
As an affiliate, we earn on qualifying purchases.
As an affiliate, we earn on qualifying purchases.
Frequently Asked Questions
Can I Replace a Light Switch Without Turning off the Power?
You shouldn’t replace a light switch without turning off the power because electrical safety is vital. Working live risks electric shock and damage to your wiring. For DIY home repair, always switch off the circuit at the breaker before starting. If you’re unsure, consult a professional. Prioritizing safety guarantees your repair is safe and effective, protecting you from potential hazards during your project.
What Tools Are Necessary for Replacing a Light Switch?
Ever wondered what tools you need for replacing a light switch? You’ll want a wire stripper to remove insulation from wires and a voltage tester to make sure the power’s off. A screwdriver is essential for loosening and tightening screws. Having these tools on hand makes the process safer and easier. Do you have a voltage tester and wire stripper ready? If not, grab them before starting to avoid any surprises.
How Do I Identify the Correct Replacement Switch?
You identify the correct replacement switch by checking its switch type—single-pole, three-way, or dimmer—and matching the color coding of the wires. Look at your current switch for labels or markings that specify its type and note the wire colors, usually black, white, or green. Make certain the new switch’s specifications align with your existing wiring and switch type to ensure compatibility and safety.
Is It Safe to Work on a Switch if I’M Not Experienced?
It’s not safe to work on a switch if you’re not experienced with electrical safety and DIY electrical work. Handling electrical components without proper knowledge can lead to shocks or fires. If you’re unsure, it’s best to turn off the power, use insulated tools, and consult a professional. Prioritizing safety guarantees you avoid accidents and damage, making DIY electrical work safer and more effective.
What Should I Do if the Switch Still Doesn’T Work After Replacement?
Did you know that 60% of electrical issues are caused by simple wiring mistakes? If your switch still doesn’t work after replacement, start troubleshooting issues by double-checking your wiring connections and confirming the circuit breaker isn’t tripped. Always prioritize electrical safety—turn off power before inspecting. If problems persist, consider consulting a professional electrician to avoid risks and ensure proper functioning.

SURAIELEC Wireless Light Switch and Receiver Kit, 15A High Power, No Wiring, No Interference, 100ft RF Range, Expandable Remote Control Wall Switches for Lamp, Ceiling Light, Fan, Outdoor Lighting
Add or Relocate Wall Switches without Wiring: Suraielec wireless light switch and receiver kit eliminates the need for…
As an affiliate, we earn on qualifying purchases.
As an affiliate, we earn on qualifying purchases.
Conclusion
You’ve just revealed the secret to becoming a DIY wiring wizard. With these steps, you’re now more powerful than a lightning bolt—able to tame even the most stubborn light switches. Remember, safety isn’t just a suggestion; it’s your superpower. Handle each project with care, and you’ll never be left in the dark—literally or figuratively. Keep practicing, stay cautious, and soon you’ll be lighting up your home with confidence and ease.

Zesllwid 3PCS Professional Electrical Disconnect Pliers, Automotive Electrical Connector Separator Removal Tool Kit for Wiring Harness, 60° & Straight Terminal Release Pliers for Car Truck SUV
3-Piece Versatile Tool Set for Automotive Repairs:This kit includes straight pliers, 60° angled pliers, and a precision terminal…
As an affiliate, we earn on qualifying purchases.
As an affiliate, we earn on qualifying purchases.

1000V Insulated Electrician Screwdriver Set – 13-Piece Professional Electrical Screwdriver Set Insulation Handle CRV Steel Magnetic Phillips Slotted Pozi Torx Tips VDE & GS Certified
SAFE CERTIFIED – VDE and GS approved, this 1000V screwdriver set guarantees electricians a safe working environment for…
As an affiliate, we earn on qualifying purchases.
As an affiliate, we earn on qualifying purchases.