
To build your own gaming PC from scratch, start by choosing components that match your performance goals, like a high-end CPU, GPU, and enough RAM. Assemble everything carefully by installing the CPU, RAM, and storage, then connect the power supply and motherboard. Install your operating system and drivers, then test your system with stress and benchmarking tools. Keep up with maintenance and upgrades over time. Keep exploring, and you’ll uncover all the steps to craft a perfect gaming rig.
Key Takeaways
- Determine your performance goals and select compatible CPU, GPU, RAM, storage, and power supply components accordingly.
- Assemble the PC by installing the CPU, cooler, RAM, and connecting all cables securely to the motherboard.
- Install the operating system from bootable media and update drivers for optimal hardware compatibility.
- Conduct stress tests and benchmarks to ensure stability, monitor temperatures, and optimize fan and overclock settings.
- Perform regular maintenance, including cleaning dust, updating drivers, and planning future upgrades for sustained performance.

YAWYORE Gaming PC Desktop Computer AMD Ryzen 5 5600GT,16GB DDR4 3200MHz,1TB M.2 NVMe PCle,550W 80PLUS PSU,WiFi,Game Design Office Console,Sea View Room, Towers Prebuilt PC (Black)
CPU: Ryzen 5 5600GT 3.6GHz (4.6GHz Turbo) 6-Core 12-Thread , brings faster response time to easily handle multi-threaded…
As an affiliate, we earn on qualifying purchases.
As an affiliate, we earn on qualifying purchases.
Selecting the Right Components for Your Gaming Rig

Choosing the right components is essential to building a gaming PC that performs well and fits your budget. Start by setting a clear performance goal—are you aiming for high-end gaming, or are you on a tighter budget? Your CPU and GPU are the core of your system, so prioritize a powerful processor and graphics card suited to your gaming needs. RAM is also pivotal; 16GB is typically enough for most games, but consider more if you stream or run demanding applications. Storage options include SSDs for faster load times and HDDs for larger, budget-friendly storage. Don’t forget a reliable power supply that can handle your components’ power draw, and choose a compatible motherboard that supports your chosen parts.

Skytech Gaming Azure 3 Desktop PC, Ryzen 7 7700X 4.5 GHz (5.4GHz), NVIDIA RTX 5070 12GB, 1TB Gen4 NVMe SSD, 32GB DDR5 RAM 6000 RGB, 850W Gold ATX 3 PSU, 360mm ARGB AIO, Wi-Fi, Win 11
AMD Ryzen 7 7700X 4.5GHz (5.4GHz Turbo Boost) CPU Processor | 1TB Gen4 NVMe M.2 SSD – Up…
As an affiliate, we earn on qualifying purchases.
As an affiliate, we earn on qualifying purchases.
Assembling Your Gaming PC Step-by-Step

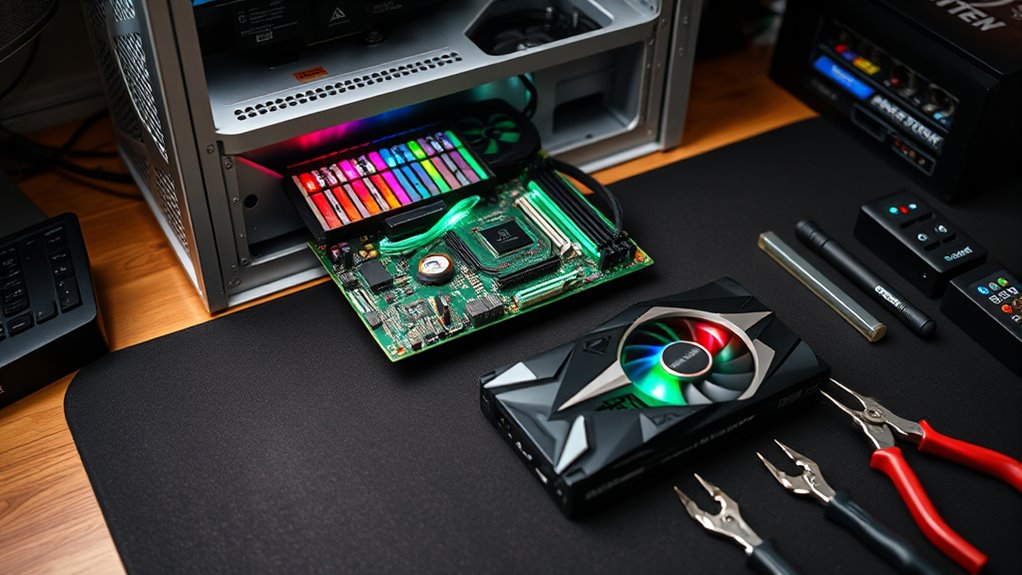
Before you start assembling your gaming PC, gather all your components and tools to guarantee a smooth build process. Begin by installing the CPU into the motherboard socket carefully, aligning the pins or contacts. Secure the CPU cooler afterward, ensuring proper thermal paste application if needed. Next, insert the RAM modules into the motherboard’s memory slots, pressing firmly until they click. Then, mount the motherboard inside the case, aligning it with the standoffs. Connect the power supply cables to the motherboard, GPU, and storage devices. Use this table for clarity:
| Step | Key Action | Tips |
|---|---|---|
| CPU installation | Insert CPU into socket | Handle by edges |
| RAM installation | Slot RAM into motherboard | Check for clicks |
| Mounting motherboard | Secure with screws in case | Avoid overtightening |
| Connecting power | Attach PSU cables to components | Ensure firm connections |
| Final checks | Confirm all cables and components are connected | Double-check connections |
Additionally, consulting motherboard specifications can help ensure compatibility and proper installation procedures.

ASUS TUF Gaming NVIDIA GeForce RTX™ 4080 Super OC Edition Gaming Graphics Card (PCIe 4.0, 16GB GDDR6X, HDMI 2.1a, DisplayPort 1.4a)
Powered by NVIDIA DLSS3, ultra-efficient Ada Lovelace arch, and full ray tracing
As an affiliate, we earn on qualifying purchases.
As an affiliate, we earn on qualifying purchases.
Installing Operating System and Essential Drivers

Once you’ve physically assembled your gaming PC, the next step is to install the operating system and essential drivers to guarantee everything runs smoothly. Start by inserting your OS installation media, like a USB drive or DVD, and boot from it. Follow the on-screen prompts to install your chosen OS, such as Windows or Linux, onto your primary drive. After installation, you’ll need to install drivers for your motherboard, graphics card, and peripherals to optimize performance and stability. Visit the manufacturer’s websites to download the latest drivers, or use their provided installation utilities. Make sure to update your OS to the latest version. This ensures you have the newest security patches and features, providing a solid foundation for your gaming experience. European cloud innovation offers reliable, energy-efficient options for hosting updates and backups, enhancing your system’s security and sustainability.

CORSAIR 4000D RS ARGB Frame Modular Mid-Tower ATX PC Case, High Airflow, 3X Pre-Installed RS Fans, InfiniRail™ Mounting System, ASUS BTF, MSI Zero, Gigabyte Stealth, Black
FRAME Modular Case System – The revolutionary FRAME system gives new meaning to the word customization. Want to…
As an affiliate, we earn on qualifying purchases.
As an affiliate, we earn on qualifying purchases.
Testing and Optimizing Your Build for Peak Performance

After assembling your gaming PC, it’s crucial to test its stability and performance to guarantee everything is running at its best. Begin by running stress tests on your CPU, GPU, and RAM using tools like Prime95, FurMark, or MemTest86. Monitor temperatures and power usage to ensure components stay within safe ranges. Check for system crashes or errors during these tests, which could indicate issues with cooling or installation. Use benchmarking software like 3DMark or Cinebench to evaluate your system’s performance and compare it to similar builds. Adjust fan curves and overclock settings if needed to boost performance without overheating. Regularly update your drivers and firmware to maintain stability and optimize performance. Additionally, paying attention to piercing care and hygiene can help prevent hardware-related infections or issues that might affect system performance. This process helps you identify bottlenecks and fine-tune your build for peak gaming performance.
Tips for Future Upgrades and Maintenance

Planning for future upgrades and regular maintenance is essential to keep your gaming PC running smoothly and staying up-to-date with new technology. Start by choosing a motherboard with extra RAM slots and PCIe slots, so you can add components without replacing your entire system. Keep your drivers and BIOS updated to guarantee compatibility and stability. Regularly clean dust from inside your case to prevent overheating and hardware issues. Monitor your system’s temperatures and performance using software tools, and upgrade your cooling solutions if needed. Back up important files frequently, so you don’t lose data during major upgrades or troubleshooting. Being aware of auditory processing challenges can also help you troubleshoot hardware or software issues more effectively. By staying proactive with maintenance and planning for future upgrades, you extend your PC’s lifespan and maintain ideal gaming performance.
Frequently Asked Questions
How Much Should I Budget for a High-End Gaming PC?
You should budget around $1,500 to $3,000 for a high-end gaming PC. This range covers top-tier components like a powerful CPU, high-end GPU, ample RAM, and fast storage. Your exact budget depends on your gaming preferences and desired performance. Keep in mind, investing in quality parts guarantees smooth gameplay and future-proofing. Don’t forget to allocate some funds for peripherals and a good monitor to maximize your gaming experience.
Which Brands Are Most Reliable for Gaming Components?
When choosing reliable brands for gaming components, focus on favorites like ASUS, MSI, Corsair, and Gigabyte. These brands boast bold builds, dependable durability, and cutting-edge technology. You’ll find stellar support, solid warranties, and superb specs that suit your gaming needs. By sticking with these trusted names, you guarantee your system stays stable, speedy, and ready to roll through intense gaming sessions without worries.
Can I Upgrade My GPU Later Without Affecting Other Parts?
Yes, you can upgrade your GPU later without impacting other parts, as long as your power supply and case support the new card’s size and power needs. Make sure your motherboard has the necessary PCIe slot and that your system’s cooling is adequate. Just verify compatibility before buying, and you’ll be able to swap out your GPU smoothly, boosting your gaming performance without any major changes to your existing setup.
What Are Common Troubleshooting Steps if My PC Won’T Boot?
When your PC refuses to boot, it’s like hitting a roadblock on a journey. First, check all connections—power cables, RAM, and graphics card. Then, listen for beeps or look for error messages. Reset BIOS or clear CMOS if needed. Remove unnecessary peripherals and try booting with minimal hardware. If it still won’t start, test components individually. Patience and systematic troubleshooting will guide you through the darkness.
How Do I Ensure Compatibility Between All Selected Components?
You guarantee compatibility by checking each component’s specifications against each other. Start by verifying the CPU socket matches your motherboard. Confirm your RAM type and speed are supported by your motherboard. Make sure your power supply can handle the total wattage of all components. Use online compatibility tools or build forums to double-check that your GPU fits your case and is compatible with your motherboard. Always read manufacturer datasheets for precise info.
Conclusion
Building your gaming PC is like crafting a masterpiece—every component plays a vital role in creating something extraordinary. With the right choices and a little patience, you open a world of endless gaming possibilities. Remember, this isn’t just about assembling parts; it’s about creating your personal portal to adventure. So, explore deeply, stay curious, and watch your dream machine come to life—because the only limit is how far your passion can take you.