This guide helps beginners decorate an indoor space for a Halloween party, from choosing a look to checking the finished setup. You will create a coordinated atmosphere with lighting, focal-point decorations, and table details while keeping walkways and exits clear. Allow about 2-4 hours for setup, depending on room size and how many decorations you use.

Get the little things that make your day delivered free — and shop member deals
- Fast, free delivery on millions of items
- Access to Prime Big Deal Days deals on October 6–7
- Prime Video, Amazon Music and more included

OHOME Halloween Tablecloths, 2-Pack
- ✔ Material: Polyester
- ✔ Dimensions: 86.6 x 51.2 inches each
- ✔ Quantity: 2

OHOME Disposable Plastic Halloween Tablecloth, 2 Pack
- ✔ Brand: OHOME
- ✔ Material: Plastic
- ✔ Dimensions: 52 x 87 inches

Halloween Caution Tape, 3 in x 90 ft, 3-Pack
- ✔ Brand: ONFAON
- ✔ Material: Polyethylene
- ✔ Width: 3 inches
Difficulty: Beginner | Time: 2-4 hours, plus shopping time
What You’ll Need
Tools & Materials:
- Tape measure or measuring tape
- Painter’s tape or removable wall hooks
- Scissors
- Step stool or stable ladder, if hanging decorations
- Battery-powered lights or LED candles
- Trash bags and a small box for packaging
Knowledge:
- Basic room measuring and arranging
- Ability to follow product instructions for hanging materials and lights
Gather decorations before setup and check that lights work. Ask the host about the party’s guest count, children or pets, and any building rules about candles, wall attachments, or fire exits. Keep decorations away from smoke alarms, heaters, and cooking areas.
OHOME Halloween Tablecloths, 2-Pack
For hosts who want Halloween décor that can return for another gathering, this polyester pair is the most balanced choice in the lineup. Each rectangular cloth measures 86.6 by 51.2 inches, close to the disposable pair’s stated 87-by-52-inch dimensions, so both options offer similar nominal coverage. The meaningful difference is care: this set can be wiped clean or machine washed, while the plastic alternative prioritizes waterproof protection and easy disposal.The black cloths feature Halloween motifs including ghosts, bats, and pumpkins, and the product details describe them as wrinkle- and fade-resistant. That combination makes them a stronger fit for a dining or serving table that will be seen throughout the event, and the cloths can also serve as photo backdrops. Compared with ONFAON’s caution tape, they create a broad, finished surface rather than a dramatic boundary or entrance accent.The tradeoff is that these are still distinctly seasonal: the Halloween artwork limits their usefulness for everyday table settings. Polyester also does not offer the same specifically stated waterproof protection as the disposable plastic set, so we would favor the latter for especially spill-prone setups where quick cleanup matters more than reusability. For most hosts seeking one substantial decoration with more than one use, though, this pair earns the top spot.
Pros:
- Two polyester tablecloths provide coverage for more than one surface.
- Wipe-clean or machine-washable care supports reuse.
- Wrinkle- and fade-resistant construction is suited to recurring seasonal use.
- Can also be used as an indoor or outdoor photo backdrop.
Cons:
- Halloween-specific motifs limit use outside the season.
- Waterproof protection is not stated, unlike the disposable plastic option.
Best for: Hosts who want a Halloween-themed table covering that can be washed and reused, or a matching backdrop option for party photos.
Not ideal for: Buyers who need explicitly waterproof disposable protection, want year-round table linens, or are decorating a doorway rather than a table.
Bottom line: We rank this set first for pairing generous table coverage with washable care and a useful backdrop alternative.
“We rank this set first for pairing generous table coverage with washable care and a useful backdrop alternative.”
OHOME Disposable Plastic Halloween Tablecloth, 2 Pack
When our priority is covering a busy food table rather than keeping a decoration for next year, the disposable OHOME pair makes the most practical case. Its 52-by-87-inch rectangular size is described as suitable for standard 8-foot tables and 8–10 guests, while the thick plastic is waterproof and designed to help protect the surface from spills and scratches. That is a different strength from the reusable polyester set: the polyester option is easier to justify for repeat use, but this one puts spill protection and quick cleanup first.The pumpkin, skeleton, and bat patterns provide a clear Halloween signal across a large surface. The glossy finish and disposable format suit buffet tables, craft stations, or gatherings where food and messy activities are likely. These cloths can also be repurposed as a photo backdrop or DIY decoration, giving them some flexibility beyond table coverage. In contrast, the ONFAON tape is better for extending a spooky look to an entrance or yard; it does nothing to shield a tabletop.There are real limits. Plastic may feel less premium than fabric, and a disposable product is a poor match for hosts trying to reduce single-use materials. Although the surface is described as wipe-clean, its disposable nature is the core convenience, not a promise of long-term reuse. We place it second because it is a strong party-day solution, but the washable polyester set is more adaptable across multiple Halloween seasons.
Pros:
- Waterproof plastic helps protect tables from spills and scratches.
- 52-by-87-inch size is specified for standard 8-foot tables.
- Two covers can be used across multiple party surfaces.
- Can be wiped clean and reused briefly as a backdrop or DIY decoration.
Cons:
- Disposable construction may not suit buyers avoiding single-use materials.
- Plastic has a less premium feel than the polyester option.
Best for: Hosts serving food or running crafts on a standard long table who value waterproof protection and uncomplicated cleanup.
Not ideal for: Eco-conscious buyers, anyone seeking a fabric-like finish, or hosts who want a table covering designed for repeated seasonal use.
Bottom line: We recommend this pair when waterproof table protection and fast post-party cleanup matter more than reusable materials.
“We recommend this pair when waterproof table protection and fast post-party cleanup matter more than reusable materials.”
Halloween Caution Tape, 3 in x 90 ft, 3-Pack
ONFAON’s caution tape is the most useful choice when the party needs atmosphere beyond the table. The set contains three 90-foot rolls in “Warning,” “Enter If You Dare,” and “Haunted Keep Out” designs, giving us several printed messages to place around a doorway, railing, yard, or haunted-house route. Unlike either OHOME tablecloth set, it can carry a Halloween theme through spaces that would otherwise remain undecorated.The tape is made from tear-resistant polyethylene and can be cut, wrapped, or hung for indoor and outdoor decorating. That flexibility makes it a better accent than a tablecloth for outlining an entrance or guiding guests toward a party area. Yet it is not a standalone room transformation: compared with the broad printed surfaces of the tablecloths, its visual impact depends on where and how we install it. It works best paired with a focal decoration or themed table rather than asked to do all the decorating alone.The key limitation is clearly stated: the tape is non-adhesive. Buyers need a way to tie or wrap it in place, and should not assume it will stick directly to walls or doors. It also offers no table protection or reusable fabric-style function. We rank it third not because it lacks length, but because its usefulness is more dependent on the layout and securing points available. For haunted entrances and outdoor accents, though, it fills a role the tablecloths cannot.
Pros:
- Three distinct printed designs add variety across a party space.
- Three 90-foot rolls provide material for multiple decorating locations.
- Tear-resistant polyethylene can be cut, wrapped, or hung.
- Suitable for indoor and outdoor Halloween decorating.
Cons:
- Non-adhesive construction requires another way to secure it.
- Provides accents rather than the broad coverage or protection of a tablecloth.
Best for: Hosts decorating doorways, railings, yards, or haunted-house paths who can wrap or hang non-adhesive tape securely.
Not ideal for: Anyone needing table coverage, adhesive wall decoration, or one all-in-one focal piece for a Halloween party.
Bottom line: Choose this set to build a haunted entrance or extend the theme outdoors, provided we have a practical way to hang or wrap it.
“Choose this set to build a haunted entrance or extend the theme outdoors, provided we have a practical way to hang or wrap it.”
As an Amazon Associate we earn from qualifying purchases.
Before You Start
Choose decorations that suit the room and the guests. Avoid open flames, sharp props at child height, and anything that blocks doors, stairs, or accessible routes. If you are using an actual ladder, place it on level ground and have another adult steady it. Test removable hooks on an inconspicuous surface and follow the package’s weight limits.
Step-by-Step Instructions
Step 1: Choose a theme and color palette
Pick one clear look before buying or placing decorations. For example, choose a friendly pumpkin patch, a classic black-and-orange party, or a spooky haunted-house style. Select two or three main colors, then list the decorations you already own and the few items you still need. A limited palette helps different decorations look intentional together.
Tip:For a family party, use cheerful faces and soft lighting. For a more eerie look, use silhouettes, gauze, and darker colors without making the room hard to move through.
Check: You can describe the theme in one sentence and have a short list of colors and decorations to use.
Step 2: Measure the room and plan activity areas
Measure the main party room, then sketch a simple layout showing the entrance, food and drink tables, seating, and open walking routes. Mark doors, stairs, and the locations of smoke alarms, outlets, heaters, and vents. Decide where one main display will go, such as behind the snack table or near the entrance.
Tip:Leave a clear route between the entrance, seating, food, and exits. Avoid putting cords across paths or decorations where guests may brush against them.
Check: Your sketch shows a focal point and clear paths to the main party areas and exits.
Step 3: Sort decorations and test lights
Group your decorations by area: entrance, walls, tables, and lighting. Check each item for damage, missing batteries, loose parts, or strong odors. Plug in electric lights to test them, or install fresh batteries in LED candles and string lights. Set aside anything that flickers, has exposed wiring, or cannot be attached securely.
Tip:Keep packaging and instructions until setup is complete, particularly for adhesive hooks and battery-operated lights.
Check: Every decoration you plan to use is in working condition, and the lights operate as expected.
Step 4: Clear and prepare the room
Move fragile items, unnecessary furniture, and everyday clutter out of the decorating area. Wipe dusty surfaces where you will attach decorations, and make sure table surfaces are dry. Place furniture according to your layout before hanging anything. Keep the route to each exit open.
Tip:Do not use nails, strong adhesive, or tacks without permission, especially in rented spaces. Use removable products rated for the surface and item weight.
Check: The room is clear enough to decorate, tables are ready, and doors and walking routes remain usable.
Step 5: Set up the main focal display
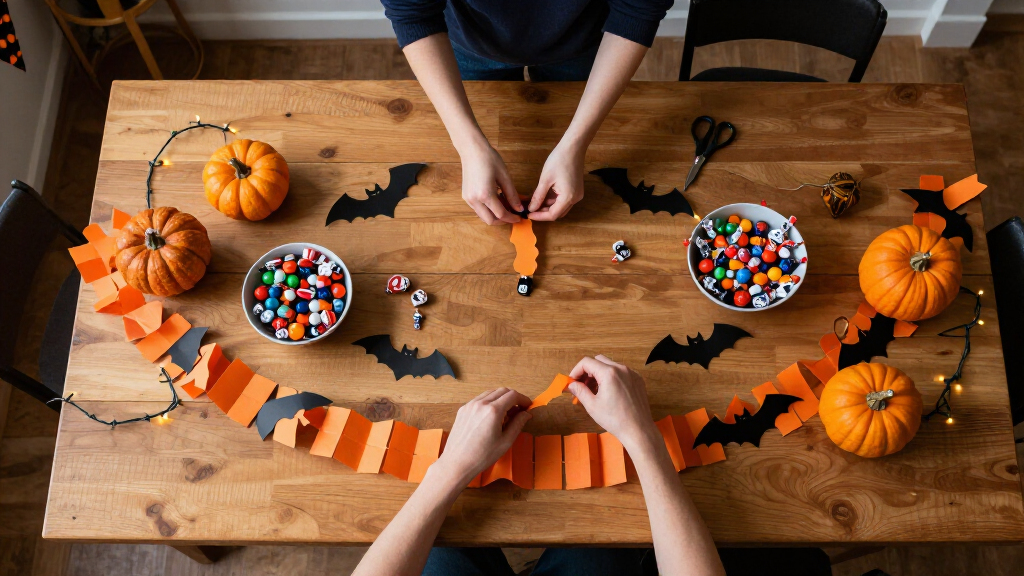
Build the largest decoration first so smaller details can support it. Place a backdrop, paper bats, a pumpkin arrangement, or another theme-appropriate display at your chosen focal point. Attach items securely and distribute their visual weight across the area. Keep the display clear of alarms, vents, heaters, and doorways.
Tip:Use lightweight paper decorations above head height and secure every edge that could flap or fall. Do not hang decorations from sprinkler heads, pipes, or electrical fixtures.
Check: The main display is visible from the party entrance or gathering area and stays in place when the room is lightly disturbed.
Step 6: Add lighting safely
Place battery-powered candles or LED lights where they add atmosphere without shining directly into guests’ eyes. Use string lights along a wall or around a stable display, securing them with suitable clips. Keep cords close to walls and away from foot traffic. Switch on each light and check the room from several angles.
Tip:Do not cover bulbs, trap lights beneath fabric, or place decorations close to heat sources. Use LED candles rather than open flames around paper, fabric, or dried plants.
Check: The room has enough light for guests to see faces, food, steps, and routes to exits.
Step 7: Decorate tables and smaller areas
Add a table covering, a small centerpiece, and a few coordinated details to food and drink areas. Keep centerpieces low enough for guests to talk across the table. Leave space for serving dishes, cups, and food labels. Place decorations on side tables or shelves only where they will not be knocked onto guests.
Tip:Keep non-food decorations separate from serving dishes, and do not use loose glitter near food. If using pumpkins, check them for soft spots or leaks.
Check: Guests can reach food and drinks comfortably, and table decorations do not crowd serving space.
Step 8: Finish the entrance and check the whole setup
Add a small themed welcome at the entrance, such as a sign or a few pumpkins, without narrowing the doorway. Walk through the room as a guest would. Look for loose tape, unstable displays, exposed cords, sharp edges, blocked exits, and dark patches. Adjust decorations, then switch on the lights and check the setup once more.
Tip:Ask another adult to walk the route too; a second view can reveal a cord or display that blends into the background.
Check: The entrance is easy to use, decorations are secure, and all guest routes remain open and adequately lit.
Common Mistakes to Avoid
- Hanging heavy items with weak tape or untested hooks. — Check the product’s weight rating, follow its instructions, and use an attachment suited to the wall surface.
Troubleshooting
Problem: A light string or decoration creates a trip or fall risk.
Solution: Unplug the light before moving it, route cords along a wall, and secure them with suitable covers or clips. Remove any unstable decoration from the route.
What Success Looks Like
The finished room has a clear Halloween theme, a visible focal display, coordinated table details, and lighting that creates atmosphere while keeping faces, food, steps, and exits easy to see. Decorations remain secure, food areas are usable, and guests can move from the entrance to seating and refreshments without stepping over cords or squeezing past props.
Next Steps
Before guests arrive, switch on the lights, clear any packaging and tools, and check the room once more for spills or shifted decorations. During the party, replace batteries or remove anything that becomes unstable. Afterward, turn off and unplug lights, sort reusable decorations into labeled containers, and discard damaged or perishable items. Check the venue’s rules before removing adhesive or returning furniture to its original position.
Frequently Asked Questions
How far ahead should I decorate for a Halloween party?
Set up large displays and wall decorations the day before if the room will not be used in the meantime. Add food-table details and fresh or perishable items closer to the party, then do a safety and lighting check just before guests arrive.
How can I decorate without damaging rented walls?
Use removable hooks or painter’s tape rated for the wall surface and the item’s weight. Test the product in a hidden spot, follow its instructions, and avoid nails, tacks, and strong adhesives unless the property owner approves them.
Can I use real candles in Halloween decorations?
Battery-powered candles are the safer choice around paper, fabric, costumes, children, and pets. If you use a real candle where permitted, place it in a stable holder on a clear, nonflammable surface and keep it attended and away from decorations.
How do I decorate a small room without making it feel crowded?
Use one wall or table as the focal point, choose a few small decorations, and keep furniture close to the walls. Use vertical paper decorations where they will not hang into paths, and leave the center of the room open.
NFL season / tailgating Picks
team gear
As an affiliate, we earn on qualifying purchases.