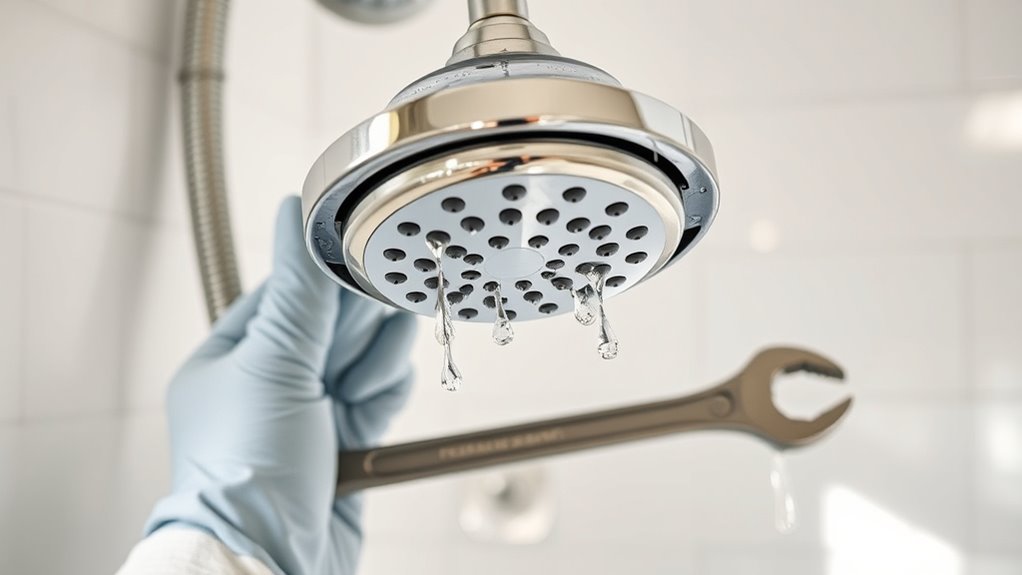

To replace a shower head in just five minutes, start by turning off the water supply or using the shut-off valve. Protect fixtures with a cloth and unscrew the old head counterclockwise, using an adjustable wrench if needed. Wrap the new shower head’s threads with plumber’s tape to prevent leaks, then tighten it hand-tight and with a wrench. Turn the water back on and check for leaks—if it drips, re-tighten or add more tape. Keep going to discover even more quick tips!
Key Takeaways
- Turn off the water supply and protect fixtures with a cloth before removing the old shower head.
- Unscrew the existing shower head counterclockwise, using a wrench if needed, and clear any buildup.
- Clean the threaded pipe and wrap it with plumber’s tape to ensure a leak-free connection.
- Hand-tighten the new shower head clockwise, then secure with a wrench without overtightening.
- Turn the water back on and check for leaks, tightening or adding tape if necessary.

If you’re considering tackling plumbing repairs yourself, it’s important to understand that many common issues can be fixed with the right tools and a bit of know-how. Replacing a shower head might seem intimidating, but with a few simple steps, you can do it in just five minutes. Not only does this upgrade improve your shower experience, but it can also promote water conservation, saving you money on your utility bills. Plus, updating your fixtures is a smart move during a bathroom renovation, giving your space a fresh, modern look without a full remodel.
Start by gathering your tools: you’ll need a new shower head, adjustable wrench or pliers, plumber’s tape, and a cloth or rag. Before you begin, turn off the water supply to avoid any unexpected leaks. If your shower head has a shut-off valve, use it; if not, shutting the main water valve is a good idea. Next, place the cloth around the existing shower head to protect it from scratches when you unscrew it with the wrench. Turn counterclockwise to loosen and remove the old fixture. If it’s stuck, applying a little heat with a hairdryer can help loosen mineral deposits or corrosion.
Gather tools, turn off water, and protect the shower head with a cloth before unscrewing it carefully.
Once the old shower head is removed, inspect the threaded pipe for any damage or buildup. Clean the threads with a rag to ensure a good seal. Wrap the new shower head’s threaded connection with plumber’s tape—this prevents leaks and ensures a tight fit. Screw the new shower head onto the pipe by hand, turning clockwise. Use the wrench to tighten it further, but don’t overtighten; you risk damaging the fittings or cracking the fixture.
After installation, turn the water supply back on and check for leaks. Run the water to ensure everything is working properly. If you notice any drips, tighten the connection slightly more or add a bit more plumber’s tape. Upgrading to a water-efficient shower head can greatly reduce water usage, supporting water conservation efforts while maintaining good water pressure. Additionally, proper installation techniques can prevent future leaks and prolong the life of your fixture.
This small change enhances your bathroom renovation, making your space more eco-friendly and cost-effective. In just minutes, you’ve completed a simple DIY plumbing task that improves your bathroom’s functionality and sustainability. It’s a quick, budget-friendly upgrade that anyone can do with basic tools and a little confidence. Keep in mind, regular maintenance and upgrades like this can extend the life of your fixtures and keep your bathroom looking and functioning great for years to come.
Frequently Asked Questions
What Tools Do I Need for Replacing a Shower Head?
To replace your shower head quickly, you’ll need basic plumbing tools like an adjustable wrench, pliers, and possibly Teflon tape for sealing. Have a cloth ready to protect the fixture. Installation tips include turning off the water, removing the old head carefully, and wrapping threads with Teflon tape to prevent leaks. These simple plumbing tools make the process smooth and efficient, letting you enjoy your new shower head in just minutes.
Can I Replace a Shower Head Without Turning off the Water?
Did you know that over 70% of shower head replacements happen without shutting off water? You can replace a shower head without turning off the water supply, but be aware that water pressure might cause some splashing. Different shower head types, like fixed or handheld, may require different handling. Just be cautious, hold the new shower head securely, and expect some water flow during the swap.
How Do I Prevent Leaks After Installation?
To prevent leaks after installing your shower head, start by applying a thread sealant or plumber’s tape to the shower arm threads before screwing on the new head. This helps with corrosion prevention and creates a watertight seal. Make sure you tighten it securely, but avoid over-tightening, which can damage fittings. Checking for leaks once the water is on allows you to make any necessary adjustments immediately.
What Types of Shower Heads Are Easiest to Install?
If you think installation is complicated, don’t worry—many shower heads are designed for easy setup. Opt for water-saving options or adjustable spray patterns, which often come with simple screw-on fittings. Look for models with universal connectors, so no extra tools are needed. These types are perfect for quick upgrades, making it easy to enjoy customized water flow without any hassle or professional help.
How Often Should I Replace My Shower Head?
You should replace your shower head every 1 to 2 years to maintain ideal water flow and water conservation. Regular replacement helps prevent lime buildup and guarantees eco-friendly options are working efficiently. If you notice reduced water pressure or mineral deposits, it’s time for a new shower head. Choosing an eco-friendly model can also improve water conservation, saving you money and helping the environment over time.
Conclusion
Now that you’ve replaced your shower head in just five minutes, you’ve proven that DIY plumbing is within your reach. With a little effort and the right tools, you’ve turned a drip into a drip-free shower. Remember, each simple fix builds confidence and saves money. So, keep your toolkit handy — because the next leak, the next drip, is just a quick fix away. Your home’s comfort is only a wrench turn away.