
Before changing flooring, you should prepare the space by clearing obstacles and inspecting the subfloor for damage. Understand the installation methods and decide whether to do it yourself or hire professionals, as proper techniques prevent future issues like creaking or buckling. Consider costs for materials and labor, and pick a durable option suited to your room’s use. Planning carefully and setting a budget helps guarantee a smooth project with long-lasting results—continue on to discover more essential tips.
Key Takeaways
- Assess and repair the subfloor to ensure a stable, even surface for new flooring.
- Understand different flooring types and their maintenance to choose the best option for your room.
- Determine whether DIY installation is feasible or if professional help is needed for quality results.
- Budget for materials, labor, tools, and potential repairs, and set aside a contingency fund.
- Clear the room, plan the project scope, and familiarize yourself with installation techniques for a smooth process.
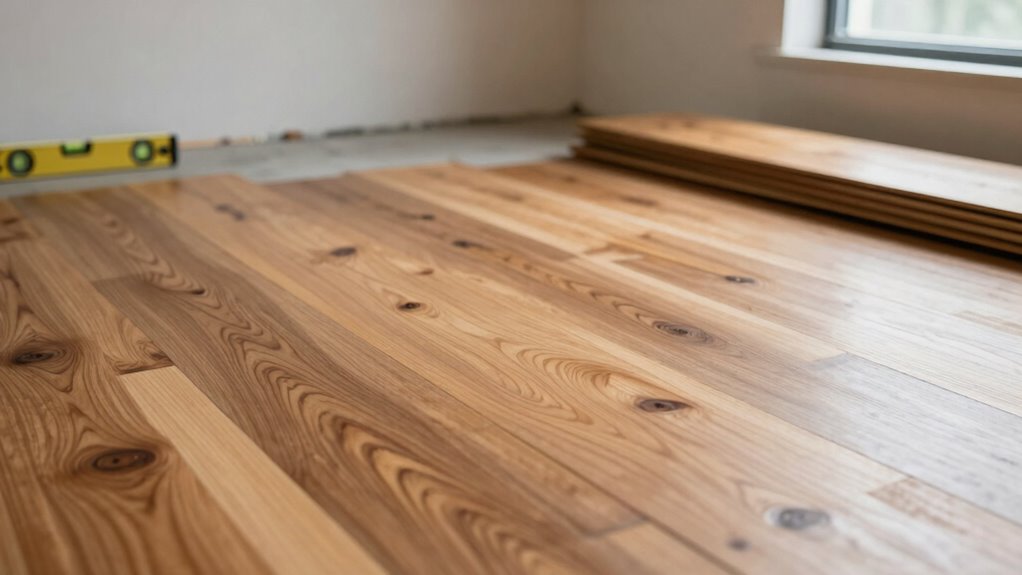
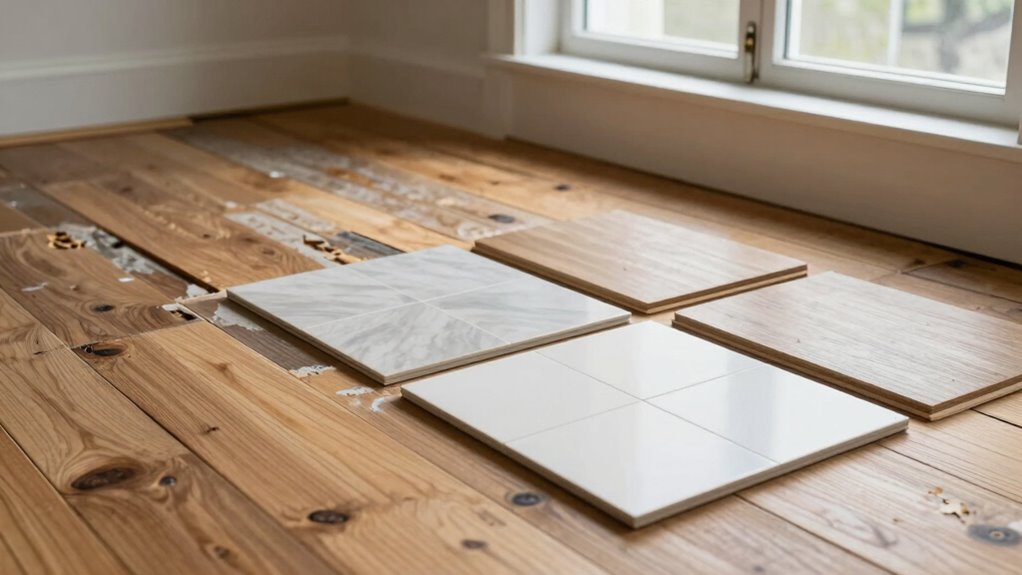
Changing your flooring can dramatically transform the look and feel of your space, but it’s important to understand what’s involved before you start. One of the first steps is area preparation, which involves clearing the room of furniture, rugs, and any other obstacles that could interfere with the installation process. You’ll want to inspect the subfloor for damage, such as loose or rotting boards, and make repairs as needed. Proper area preparation ensures the new flooring lays smoothly and lasts longer, preventing future issues like creaking or buckling. It’s worth investing time and effort here because skipping or rushing this step can lead to costly problems down the line. Additionally, understanding flooring installation techniques can help you better evaluate whether to do it yourself or hire professionals. Knowing the proper techniques also reduces the risk of installation errors that could compromise your flooring’s longevity.
Thorough area prep prevents future issues and ensures your new flooring lasts longer and looks better.
As you plan your flooring change, you also need to contemplate cost considerations. The cost isn’t just about the material you choose; it includes labor, tools, and any additional repairs. Materials vary greatly—from budget-friendly options like laminate or vinyl to premium choices like hardwood or tile. Each has its own price point and installation requirements, which can impact your overall budget. For example, installing tile or hardwood often demands professional help, adding to the labor costs. Keep in mind that unexpected expenses may arise if your subfloor needs extensive repair or leveling, so it’s wise to set aside a contingency budget. Understanding construction and repair processes can help you anticipate potential challenges and budget accordingly.
Before making your purchase, think about the long-term maintenance and durability of the flooring options you’re considering. While some floors may be cheaper upfront, they might require more frequent replacement or upkeep, increasing your total expenditure over time. Additionally, consider your lifestyle and the room’s function—high-traffic areas demand more durable materials, which might be pricier but save you money in the long run.
Another key aspect is understanding the installation process itself. If you decide to do it yourself, you’ll need to gather the necessary tools and learn the proper techniques, which can be time-consuming and physically demanding. On the other hand, hiring professionals adds to the cost but often results in a cleaner, more durable finish. Clarifying these details beforehand helps you manage expectations and ensures you’re prepared for the scope of work. Being familiar with installation requirements can also help prevent delays or issues during the project.
Ultimately, changing flooring is a substantial project that impacts your home’s aesthetics and functionality. By focusing on thorough area preparation and understanding the cost considerations involved, you set yourself up for a smoother process and a satisfying result. Taking the time to plan carefully now can save you money and frustration later, ensuring your new floor enhances your space for years to come.

WORKPRO Laminate Wood Flooring Installation Kit with Reinforced Double-Faced Mallet, Heavy Duty Pull Bar, Tapping Block and 30-Piece Spacers Included,Multicolor
Reinforced Mallet: Constructed of cast iron with bright chrome plating, the hammer is equipped with the hardness of…
As an affiliate, we earn on qualifying purchases.
As an affiliate, we earn on qualifying purchases.
Frequently Asked Questions
How Long Does the Installation Process Typically Take?
The installation process usually takes one to three days, depending on the room size and flooring type. First, you’ll need to allow time for flooring removal and subfloor protection to guarantee a smooth installation. If you have multiple rooms, expect additional days. Proper preparation, including clearing the area and checking the subfloor, helps speed things up. Keep in mind, patience guarantees a quality, lasting finish.
Can Existing Flooring Be Removed Without Damaging Subflooring?
Yes, you can remove existing flooring without damaging the subfloor if you proceed carefully. Start by gently prying up the old flooring, using proper tools to avoid gouging or scratching the subfloor. Take your time, especially around edges and seams, to prevent subfloor damage. If you’re unsure, consider consulting a professional or following detailed removal instructions to guarantee a clean floor removal process and protect your subfloor.
What Are the Best Flooring Options for Allergy Sufferers?
If you’re an allergy sufferer, opt for hypoallergenic materials like vinyl, ceramic, or hardwood flooring, which don’t trap pet dander or dust mites. These options are easy to clean and help with pet allergy prevention. Avoid carpets, as they can harbor allergens. Regular cleaning and choosing low-pile options further reduce allergy triggers, creating a healthier environment.
How Do I Prepare My Home for Flooring Replacement?
To prepare your home for flooring replacement, start by removing furniture and covering remaining items with protective blankets or plastic. Implement dust mitigation strategies, like sealing off the work area with plastic sheeting, to minimize mess and airborne debris. Clear the space thoroughly, disconnect electronics, and guarantee good ventilation. These steps help protect your belongings and keep dust levels low, making the replacement process smoother and cleaner.
Are There Eco-Friendly Flooring Alternatives Available?
Yes, eco-friendly options are available for your flooring. You can choose sustainable materials like bamboo, cork, reclaimed hardwood, or linoleum made from natural, renewable resources. These options reduce environmental impact and often emit fewer volatile organic compounds (VOCs), making your home healthier. When selecting eco-friendly flooring, look for certifications like GreenGuard or FSC to verify you’re choosing truly sustainable materials that align with your eco-conscious values.

SQUEEEK NO MORE Squeaky Floor Repair Kit for Hardwood, Carpet, Vinyl & Linoleum – Complete Floor Squeak Repair Kit Includes Joist Finder Drill Bits, Tripod Fixture and 50 Counter-snap Screws
Eliminate Squeaky Floors for Good – A trusted US brand since 1993, The SQUEEEK NO MORE squeaky floor…
As an affiliate, we earn on qualifying purchases.
As an affiliate, we earn on qualifying purchases.
Conclusion
Before you swap out your flooring, remember it can boost your home’s value by up to 10%. Planning carefully guarantees you choose the right materials, budget wisely, and avoid surprises. Whether you opt for hardwood, tile, or carpet, understanding the process saves time and money. So, take your time to research, measure accurately, and prepare for installation. Your new floor will not only enhance your space but also make your home more inviting and stylish for years to come.

Art3d 36-Pack 54 Sq.ft Peel and Stick Floor Tiles Vinyl Plank Flooring Wood Look, Adhesive and Waterproof Tile Sticker for Bedroom, Living Room, Kitchen, RV in Rosewood
Stylish – Authentic wood looking and grain texture, adding timeless feature for your home!
As an affiliate, we earn on qualifying purchases.
As an affiliate, we earn on qualifying purchases.
WORKPRO Laminate Wood Flooring Installation Kit with Reinforced Double-Faced Mallet, Heavy Duty Pull Bar, Tapping Block and 30-Piece Spacers Included,Multicolor
Reinforced Mallet: Constructed of cast iron with bright chrome plating, the hammer is equipped with the hardness of…
As an affiliate, we earn on qualifying purchases.
As an affiliate, we earn on qualifying purchases.