TL;DR
A closet rig is mainly about controlling reflections and echoes, not complete soundproofing. Moving the rig away, treating nearby surfaces, and ensuring good ventilation make a huge difference. You can get great results with simple DIY tweaks—no need for costly soundproofing.
Ever considered turning a closet into your own vocal booth or podcast studio? It’s a trick used by creators everywhere. The secret isn’t just slapping foam on the walls—it’s about where you put your gear and how you treat the surfaces around it.
In this guide, you’ll learn how to make your closet rig sound better, reduce echoes, and avoid common pitfalls like heat buildup. Whether you’re recording vocals, voice-overs, or just trying to keep noise from bothering others, the right placement and treatment can make all the difference.
Acoustic dampening
& the rig in the closet.
The most powerful noise fix isn’t a material — it’s a floor plan. A rig you can’t hear because it’s in another room beats any amount of foam. Tap the approaches in Part 1 to see what actually works.
(another room)
(levers 1–4)
(door / barrier)
(acoustic foam)
Contain the noise, not the heat
Key Takeaways
- Moving your rig into another room is the most effective way to cut noise, especially for AI workstations.
- Treat the surfaces closest to your microphone—walls, ceiling, desk—to control reflections and echo.
- Proper ventilation prevents heat buildup in closet rigs, avoiding thermal throttling and fan noise.
- Sealing gaps around the door and vents helps contain sound and boosts your acoustic treatment efforts.
- Bass traps in the corners can reduce low-end muddiness in small spaces, but they’re often optional.

Focusound 52 Pack Acoustic Foam Panels 1" x 12" x 12" Sound Proof Foam Panles Soundproofing Noise Cancelling Wedge Panels for Home Office Recoding Studio with 300PCS Double-Side Adhesive
Soundproofing - Acoustic foam panels triangular grooves structure for better noise absorption, helps to reduce and absorb unwanted...
As an affiliate, we earn on qualifying purchases.
As an affiliate, we earn on qualifying purchases.
Why Your Closet’s Soundproofing Isn’t About Blocking All Noise
Most people think soundproofing means stopping sound from escaping. That’s a myth in small spaces. Acoustic dampening in a closet focuses on reducing echoes and reflections, not sealing every crack.
Think of it like a guitar amp. You can’t completely block the sound without thick walls, but you can control how it bounces around. The same goes for your closet setup—treating surfaces and managing reflections makes your recordings clearer without needing total isolation.
For example, adding foam or blankets softens the harsh reverb bouncing off the walls, but won’t stop the sound from leaking into other rooms. That’s where sealing gaps and blocking gaps come into play, which is a different ballgame.
Understanding this distinction is crucial because many creators waste time and money trying to soundproof their closet when what they really need is effective reflection control. Over-sealing or excessive treatment can also lead to an overly dead space, which might make recordings sound unnatural. The goal is to find a balance that reduces problematic echoes without muffling your voice entirely.
Focusound 52 Pack Acoustic Foam Panels 1" x 12" x 12" Sound Proof Foam Panles Soundproofing Noise Cancelling Wedge Panels for Home Office Recoding Studio with 300PCS Double-Side Adhesive
Soundproofing - Acoustic foam panels triangular grooves structure for better noise absorption, helps to reduce and absorb unwanted...
As an affiliate, we earn on qualifying purchases.
As an affiliate, we earn on qualifying purchases.
The Most Effective Fix: Move It Away and Why Distance Matters
If you want to cut down noise dramatically, the best move is to put the rig in another room. A wall or door is better at stopping sound than any foam panels. The closer your gear is, the more echoes and direct sound reach your ears.
Imagine having a loud desktop in your living room versus in a basement. The basement’s walls and distance naturally dampen the noise. The same logic applies to a closet rig—distance is your best friend.
For example, if your PC or server is in a closet on the other side of the house, you won’t hear its fan noise or hum. Your workspace remains silent, even if the machine is loud.
This is because sound intensity diminishes with distance—every foot away from the source reduces the volume you perceive. Additionally, barriers like walls and doors absorb or deflect sound waves, preventing them from traveling directly into your recording space. Recognizing this tradeoff means that sometimes, the simplest solution—moving your equipment into a different room—can be more effective than complex treatments. It also highlights that the effort spent on treatment is best paired with strategic placement to maximize noise reduction.

2 Pack Studio Monitor Isolation Pads for Large Speakers Sound Insulation Studio Foam Prevents Vibrations Acoustic Speaker Isolation Pad High Density Fits Most Stands
Enhanced Sound Clarity: Saiqiang speaker isolation pads can reduce vibrations and resonance, providing cleaner, more accurate sound from...
As an affiliate, we earn on qualifying purchases.
As an affiliate, we earn on qualifying purchases.
The 'Rig in the Closet' Setup: How to Make It Work Without Overheating
Putting a hot, power-hungry machine in a closet sounds like a recipe for disaster. But with proper airflow, it’s a game-changer for noise. The key is ventilation, not just sealing it tight.
Think of it like a tiny sauna—without enough ventilation, the heat builds up fast. You need a passive vent, or better yet, a quiet exhaust fan that pulls hot air out and pulls cooler air in.
For example, a small duct or a vent with a low-noise fan can keep temperatures in check while still muffling the noise. Some manufacturers design soundproof cabinets that combine foam lining with temperature-controlled exhaust fans—these are worth the investment if you want quiet and cool.
Proper ventilation is essential because heat buildup can lead to thermal throttling, where your machine reduces performance to cool down. Overheating can also damage hardware over time. At the same time, ensuring airflow helps contain noise by preventing fans from running at full speed. For more tips on creating a quiet setup, see this guide on acoustic dampening and ventilation.
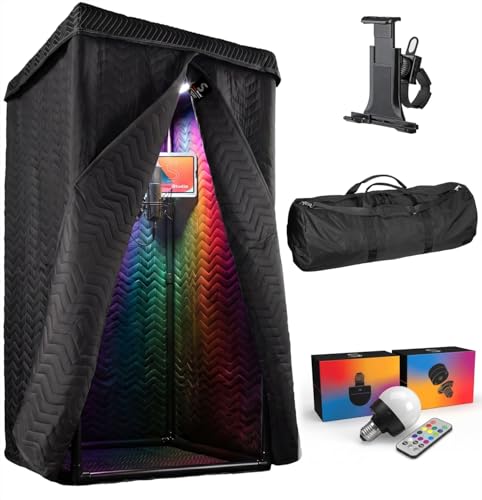
'Snap Studio' XL Portable Recording Booth | '#1 Vocal Booth' Rolling Stone | Record Crisp Dry Echo-Free Vocals at Home or On-The-Road | The Original & Best Studio Booth, Trusted By Singers & Voiceover
#1 Recommended Portable Recording Booth — Featured by Rolling Stone Magazine as the “best sound booth”, Snap Studio’s...
As an affiliate, we earn on qualifying purchases.
As an affiliate, we earn on qualifying purchases.
Surface Treatment Strategies: Where to Focus Your Acoustic Efforts
Start by treating the surfaces closest to the microphone—walls, ceiling, and the door. These are your primary reflection points. Cover them with blankets, foam panels, or even heavy quilts if you’re on a budget.
For example, hanging a blanket over the door and sticking foam panels on the ceiling can drastically reduce echo. Also, treat the desk surface if it’s hard and reflective, since it can bounce sound back into the mic.
Small spaces benefit from treating side walls and the ceiling equally. Bass buildup is usually minor but can be addressed with bass traps in the corners if needed. Remember, the goal is to soften the sharp reflections, not deaden the space completely.
Prioritizing these surfaces matters because they are the first point of reflection and are most responsible for echo and reverb. Over-treating less critical areas can lead to an unnaturally dead sound or unnecessary expense. Focus on the key reflection points to balance clarity and natural sound. This targeted approach ensures your efforts are efficient and effective, providing the best improvement in sound quality without overcomplicating the setup.
Sealing Gaps and Blocking Noise Leaks – Your Next Step
Even if you treat the inside of the closet, gaps around the door or vents can leak noise. Sealing cracks with weatherstripping or acoustic sealant makes a big difference.
For example, hanging a thick blanket or a DIY curtain over the door helps block sound from escaping. You can also seal small gaps around vents or electrical outlets.
Think of it like sealing a leak in a boat—every little gap can let noise escape. Proper sealing keeps the sound contained and makes your treatment more effective. It also prevents external noise from entering, which is equally important if you’re recording in a noisy environment. The tradeoff here involves balancing accessibility and ease of sealing with the level of sound containment needed. For instance, a removable curtain over the door allows quick access while maintaining a barrier against sound leakage. Using foam weatherstripping around the door frame can significantly reduce sound leaks without making the space feel closed off. Remember, every gap sealed improves overall acoustic performance and prevents external noise from contaminating your recordings.
Should You Add Bass Traps in a Small Closet? Yes or No?
Bass buildup is a common trouble spot in tiny rooms. It’s caused by standing waves that amplify low frequencies. In a closet, bass traps in the upper corners can help tame this problem.
For example, a small foam bass trap in each corner can reduce the boominess that makes recordings muddy. But don’t overdo it—sometimes, a simple panel does the trick.
Recent DIY experiments show that even modest bass trapping can improve clarity, especially if your mic picks up low-end rumble or you notice muddiness in recordings.
Understanding when and why to add bass traps is important because low-frequency issues are often more challenging to control due to their longer wavelengths. In small spaces like closets, bass traps help prevent these frequencies from causing a muffled or boomy sound, which can muddy your recordings. However, over-adding traps can make the space overly dead, reducing natural resonance and making your voice sound unnatural. A targeted approach—adding traps only in the corners where low frequencies tend to accumulate—provides a good balance between controlling bass and maintaining a natural sound. The key is to listen critically and add traps only when low-end muddiness becomes a noticeable problem.
The Best Placement Tips for Your Closet Rig
Placement is everything. Keep your microphone away from reflective surfaces like the wall behind it. Position your mic so it faces away from the door or hard surfaces that cause echoes.
For example, place the mic near a soft surface—like a foam panel or a blanket—at the reflection point. Also, consider the desk setup: a soft cloth or foam underneath your mic can soften bounce-back.
And don’t forget to treat the ceiling and side walls—tiny adjustments here make a big difference in the final sound.
To maximize clarity, position your microphone at an optimal distance—generally 6-12 inches from your mouth—and angle it slightly away from reflective surfaces. Using a small stand or boom arm can help place the mic in the best spot, while adding a foam or isolation shield reduces unwanted reflections. Keep in mind that even small positional tweaks, like angling the mic or changing its height, can significantly improve sound quality by minimizing room tone and early reflections. The goal is to find a sweet spot where your voice sounds natural and clear, free from harsh echoes or boomy bass.
Handling Ventilation, Power, and Cables Without Sacrificing Silence
Ventilation is crucial for a closet rig—hot equipment needs airflow. Use quiet fans or passive vents to keep temperatures stable. Running cables neatly behind panels or inside ducts helps avoid clutter and noise transmission.
For example, a ducted exhaust with a low-noise fan can keep your gear cool without adding noise. Power strips with surge protection keep everything tidy and safe.
Balancing airflow and noise control requires smart planning. Think of it like a tiny HVAC system—quiet, efficient, and well-organized.
Choosing the right ventilation method involves understanding the noise levels of fans and the airflow needed. Low-noise, high-quality fans are designed to operate quietly while providing sufficient airflow. Installing ductwork or vents with acoustic baffles can prevent noise from traveling along ducts. Proper cable management—using clips, sleeves, or conduits—reduces rattling and keeps cables from obstructing airflow. The tradeoff here is between ensuring adequate cooling and maintaining silence; investing in quality components and thoughtful routing can help you achieve both goals, ensuring your equipment runs smoothly without introducing unwanted noise into your recordings.
Frequently Asked Questions
Can a closet really work as a vocal booth or podcast studio?
Yes. With proper treatment and placement, a closet can significantly reduce echoes and reflections. It’s not about full soundproofing but about controlling how sound bounces around, making your recordings clearer and more professional.What is the difference between acoustic treatment and soundproofing?
Acoustic treatment reduces echoes and reflections inside a space, making it sound better. Soundproofing blocks sound from escaping or entering. In small closets, treatment is usually enough for good recordings, while full soundproofing is much more complex and expensive.Where should I put foam, blankets, or panels inside my closet?
Focus on the walls closest to your mic, the ceiling, and the door. Treating these surfaces reduces reflections significantly. Also, add soft materials near your desk if it’s reflective. Placement matters more than just slapping foam everywhere.Do I need bass traps in such a small space?
If you notice low-frequency muddiness or boominess, installing bass traps in the upper corners can help. Most small closets don’t need heavy bass trapping, but a little can improve clarity if low-end buildup is an issue.How do I handle ventilation without losing silence?
Use quiet, low-noise fans or passive vents to circulate air. Ducted exhaust systems with soundproofing can keep the space cool without adding noise. Proper cable management and placement also help keep things tidy and quiet.Conclusion
Think of your closet as a mini studio—its success hinges on smart placement, surface treatment, and ventilation. You don’t need a soundproof vault; you need a space that softens echoes and keeps heat out.
With simple DIY tweaks like sealing gaps and treating reflective surfaces, you’ll turn a cramped closet into a surprisingly effective recording spot. It’s about making the space work for you, not against you.
So, next time your gear roars, remember: the best soundproofing is often just a few thoughtful steps away. Your quiet workspace is within reach—get started today.